NC Editor Menus
Hurco's NC system provides many levels of program editing, as well as editing tools, to simplify the task.
The NC Editor contains these top level menus:
Jump and Search Functions Menu
Basic Programming Menu
The Basic Programming Menu provides access to the different NC Editor screens.
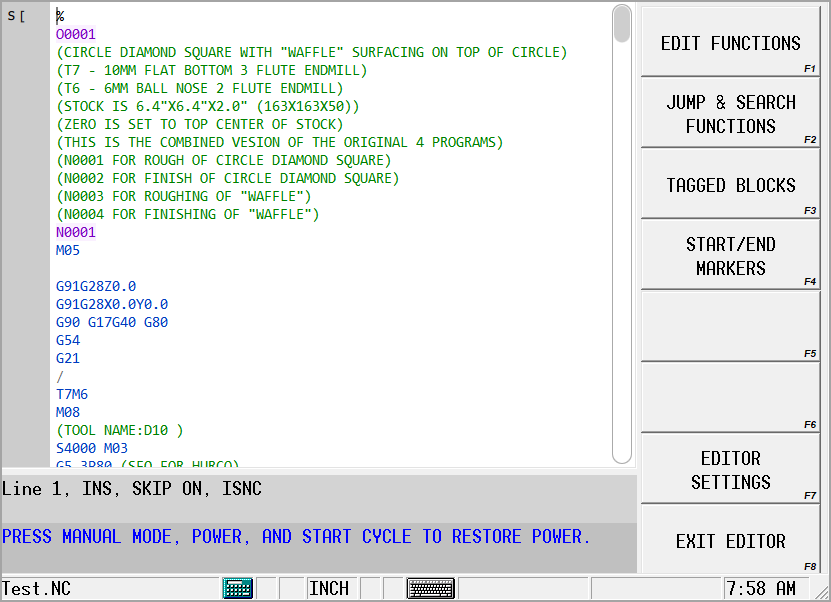
The Basic Programming softkeys provide these functions:
-
Edit Functions—Invokes Edit Functions menu
-
Jump and Search Functions—Invokes Jump and Search Functions menu.
-
Tagged Blocks— Invokes the tagged blocked menu.
-
Start/End Markers— Invokes the Start/End Markers menu.
-
Editor Settings— Invokes the NC Editor Settings menu.
-
Exit Editor—Exits the NC Editor and moves to the Input screen. Select Part Programming to return to the NC Editor screen.
Edit Functions Menu
The Edit menu provides advanced editing functionality to the user.
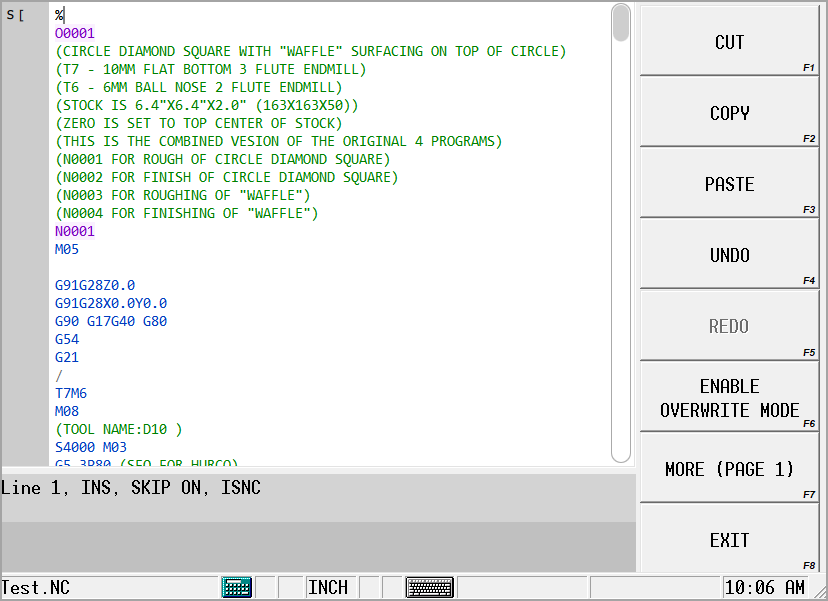
When the Edit softkey is selected from the Basic Programming menu, these softkeys appear:
-
Cut—copies the selected text to the Windows clipboard. In addition, the selected text is deleted from the part program. If the keyboard is available, Ctrl + X combination will cut the selected text and place it in the Windows clipboard.
-
Copy—this softkey copies the selected text to the Windows' clipboard memory. If the keyboard is available, this action can be achieved by pressing Ctrl + C combination. Text can be selected by dragging the stylus (up/down/right/left) across the editing area of the screen, or by holding down the keyboard Shift key and using the up/down/left/right arrow keys to select text.
-
Paste—text previously copied to the Windows' clipboard is inserted at the current cursor position. If the keyboard is available, this action can be achieved by pressing Ctrl + V keys.
-
Undo—each click on undoes the previous editing operations starting from the latest to the earliest. The depth of the undo buffer is 100. If more than one text modification was performed in a single step (e.g. “Replace All”), all those modifications will be undone in one step as well. If the keyboard is available, Ctrl + Z combination will result in the same action.
-
Redo—each click redoes the editing operation(s) previously undone by the Undo softkey. If the keyboard is available, Ctrl + Y combination will result in the same action.
-
Enable Overwrite Mode—switches the data entry style between insert and overwrite. Currently active mode is shown on the status bar of the window - “INS” indicates Insert and “OVR” indicates Overwrite.
|
|
You can also use the touchscreen to toggle the Enable Overwrite Mode in the Editor status bar. |
-
More (Page 1)— Invokes More (Page 2) where the following softkeys are available:
-
Insert Block Before—Inserts a blank line before the block where the cursor is located. This permits addition of a new block of data. This softkey will be disabled if text can't be inserted at the current cursor location.
-
Delete Block(s)—Removes the block where the cursor is positioned. This softkey will be disabled if the block can't be deleted.
-
Find & Replace—Activates a popup menu where search text and replacement text are entered. NC Editor finds occurrences of the search text and replaces it with the replacement text.
-
More (Page 2)— Invokes More (Page 1).
-
-
Exit—loads the Basic Programming menu.
Jump and Search Functions Menu
The Jump and Search menu provides the flexibility to locate hard-to-find items in program memory using the block or sequence number or searching for specific address characters, numeric parameters, or words.
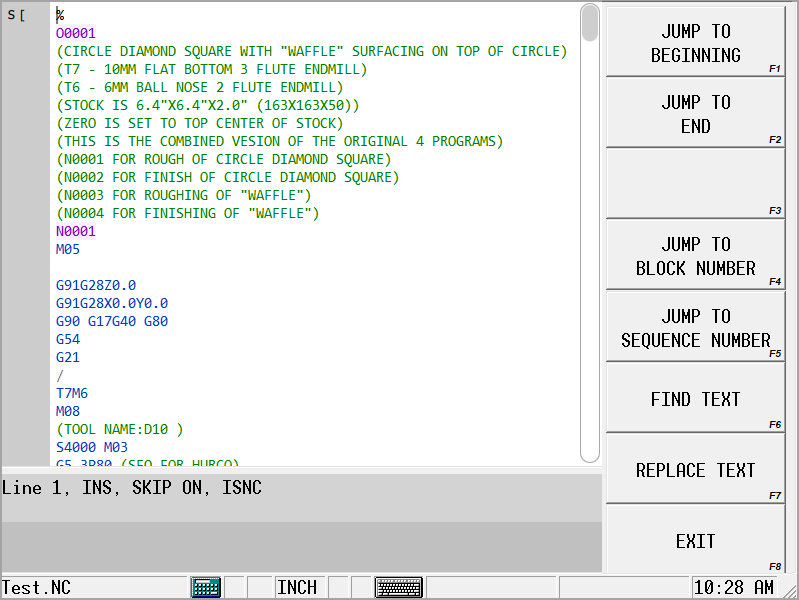
When the Jump & Search Functions softkey is selected from the Basic Programming menu, these softkeys appear:
-
Jump to Beginning—moves the cursor to the beginning of the first program block in memory. If a keyboard is available, Ctrl + Home combination will result in the same action.
-
Jump To End—moves the cursor to the beginning of the last program block in memory. If the keyboard is available, Ctrl + End combination will result in the same action.
-
Find Text— activates the Find and Replace popup box. Refer to Find and Replace Popup Box for more information.
-
Replace Text— activates the Find and Replace popup box. Refer to Find and Replace Popup Box for more information.
-
Jump to Block Number—enter a block number in the popup box. The cursor is positioned on the specified block. The number entered refers to the position that block has in NC memory.
|
|
You can also use the touchscreen to select the Line number in the Editor status bar to open the Jump to Block popup box. |
-
Jump to Sequence Number—enter a sequence number (N code) in the popup box. The cursor is positioned on that block.
-
Exit—loads the Basic Programming menu.
Find and Replace Popup Box
The Find and Replace popup box allows the user to search for specific text in the part program and replace the text if needed. Select ![]() to show/hide the replace functions.
to show/hide the replace functions.
Enter search text and select Find Next to find the next occurrence of the entered text following the current cursor position. If found, the text is highlighted. Select Find Previous to highlight the previously found text.
Specify the replacement text by entering it into the Replace field and select Replace to replace the search text with the specified replace text. Select Replace All to replace all instances of the search text with the specified replace text. Select
to close the Find and Replace popup Box.

Tagged Blocks Menu
The Tagged Blocks menu offers access to block tagging functionality.
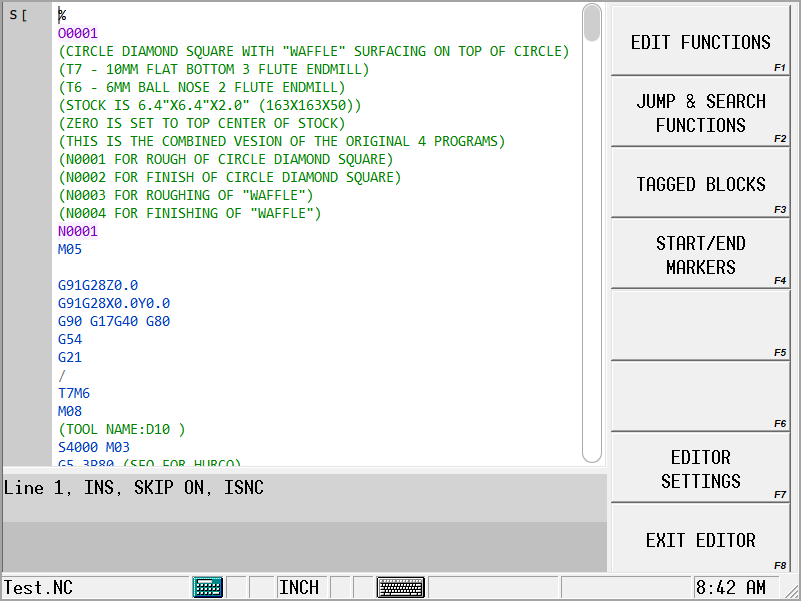
The menu contains the following softkeys:
-
Tag Block—tags a block by underlining it. There is no limit on the amount of tagged blocks you can have.
-
Jump to Previous Tagged Block—NC editor tries to find the closest tagged block before the current cursor's position. If such block is found, the cursor is placed in the beginning of the block.
-
Jump to Next Tagged Block—NC editor tries to find the closest tagged block after the current cursor's position. If such block is found, the cursor is placed in the beginning of the block.
-
Tagged Block List—invokes Tagged Blocks List screen, which allows the user to review the tagged block and manage the tags. See NC Editor Tagged Blocks.
-
Exit —loads the Basic Programming menu.
NC Editor Tagged Blocks
The NC Editor Tagged Blocks screen is accessed with the Tagged Block List softkey on the Tagged Blocks menu. The tagged blocks, Start/End markers, and Set Graphics Start/End markers in a program are displayed in the Tagged Blocks list.
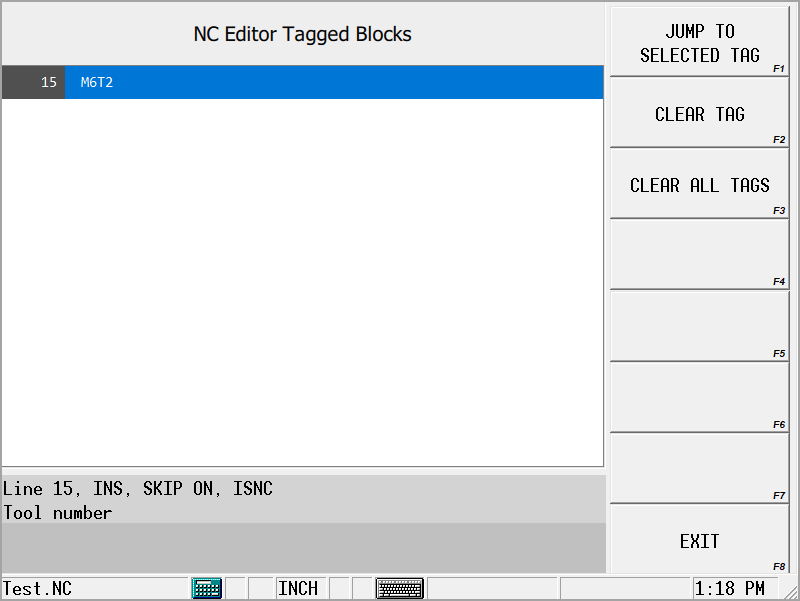
Softkeys are:
-
Jump to Selected Tag—goes to the selected tag in the program.
-
Clear Tag—deletes the selected tag.
-
Clear All Tags—deletes all tags in the list.
-
Exit—loads the Basic Programming menu.
Start/End Markers Menu
The Start/End Markers menu allows selection of the part program to be processed for graphics and for execution.
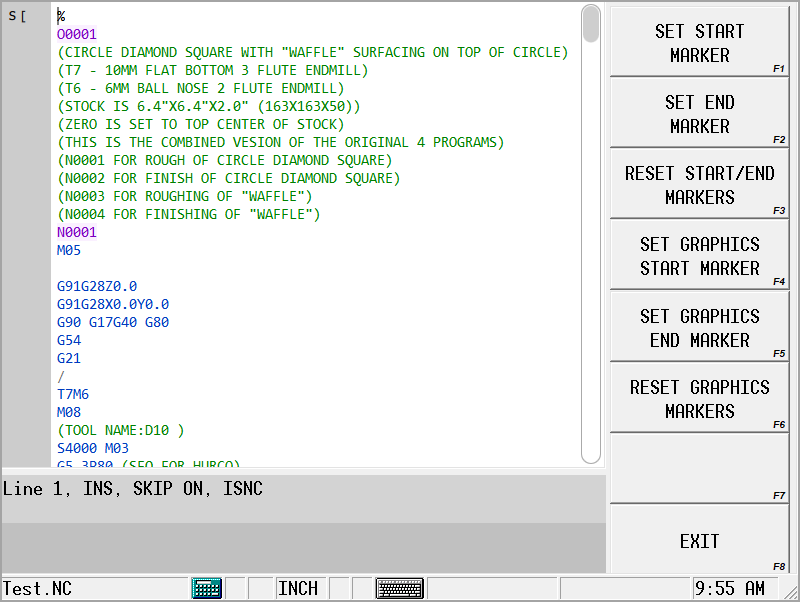
The menu contains the following softkeys:
-
Set Start marker—indicates the block that the system should use to start program execution when running and verifying the program. A letter S is inserted to the left of the block, and the code before the marker is grayed out.
-
Set End marker—indicates the block that system should use to end program verification and execution. A letter E is inserted to the left of the block, and code after the end marker is grayed out.
-
Reset Start/End Markers—restores start and end markers to their defaults. The defaults are at the beginning and end of the program.
-
Set Graphics Start Marker—marks the current block as the beginning point for the graphics display by inserting a left bracket ([) to the left of the block.
-
Set Graphics End Marker—marks the current block as the ending point for the graphic display by inserting a right bracket (]) to the left of the block.
|
|
If the Graphics Start and Graphics End markers overlap, the pound (#) sign is displayed to the left of the line. |
-
Reset Graphics Markers—returns start and end wireframe markers to their default locations. The defaults are at the beginning and end of the program.
|
|
If the Start and End markers overlap, the dollar ($) sign is displayed to the left of the line. |
-
Exit— loads the Basic Programming menu.
NC Editor Settings Menu
The NC Editor Settings screen allows you to set the following NC Editor options:
-
Block Skip Enable state
-
Text font, size, and style
-
Text Smoothing
-
Color scheme
-
Syntax foreground and background colors. See NC Editor Syntax Color Settings for more information.
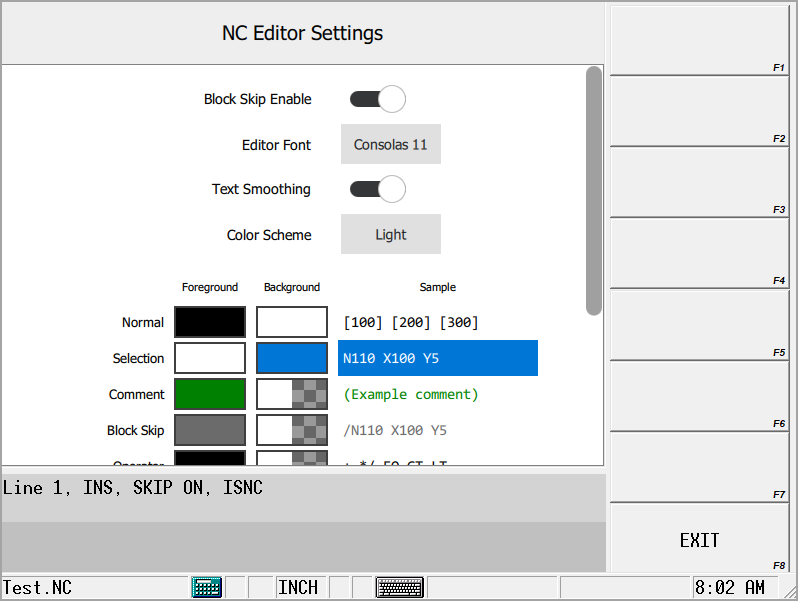
Refer to the Field Glossary for NC Editor Settings definitions:
NC Editor Syntax Color Settings
The NC Editor Settings screen contains options to customize the foreground/background colors and the background color transparency for specific syntax types in your program.
To select a new foreground and/or background color for a syntax type:
-
Select the color box in the Foreground or Background column to open the Select Color window.
-
Select or specify a color.
-
Select OK.
When modifying a background color, adjust the color transparency using the Alpha Channel setting in the Select Color window. 255 = zero transparency and 1 = maximum transparency. View sample program text for syntax types in the Sample column.
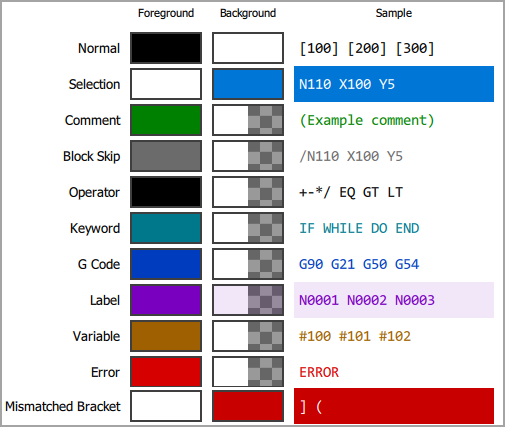
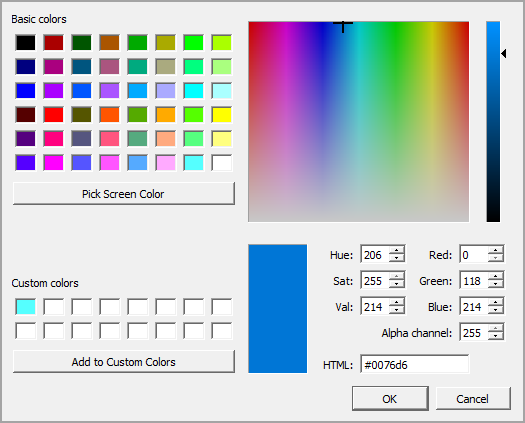
Please note: The Alpha Channel (background color transparency) setting is only available for Background colors.
More Information Online
For more information about the WinMax NC Editor, view the NC Editor video on the Hurco SSE YouTube page by selecting NCEditor/Youtube/HurcoSSE.com or scanning the code below with your mobile device.
