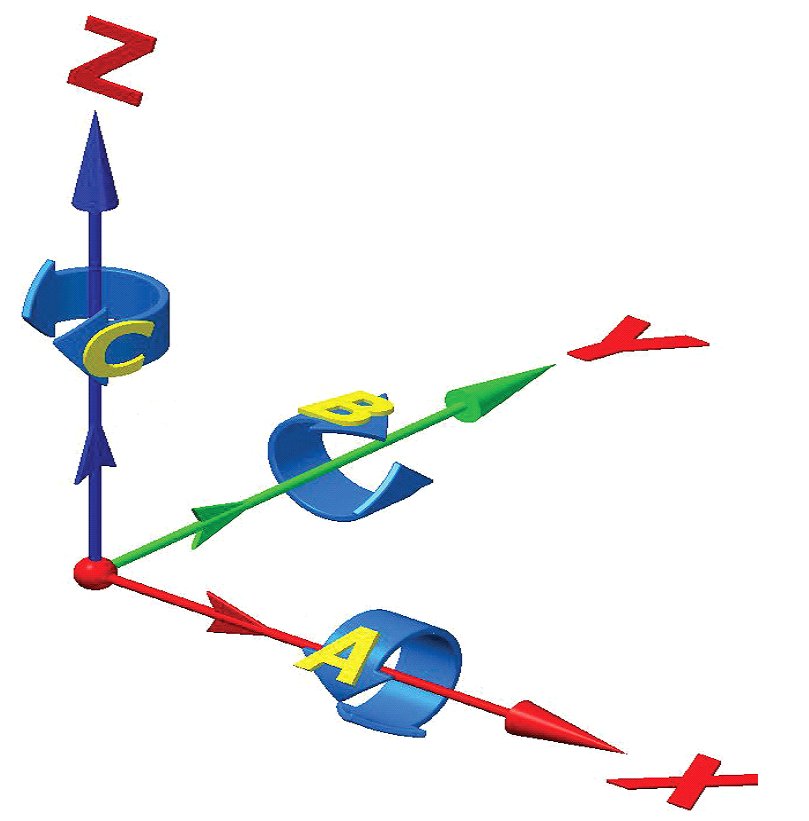
Rotary Overview
Rotary-axis and tilt-axis operations and hardware (e.g., rotary table, trunnion table, swivel head) are typically used to cut around a cylindrical part while it is turning. When your machine is equipped with rotary-axis and/or tilt-axis hardware, you can mill more diverse parts than with 3-axis machining. Hurco’s Conversational rotary part programming allows you to easily drill and contour cylindrical, curved, odd-shaped or asymmetrical parts using rotary-axis and/or tilt-axis hardware.
|
|
A rotary axis can move in a 360° rotation in positive or negative directions. See Rotary Axis. A tilt axis moves less than a 360° rotation. The machine configuration determines the limits of tilt-axis rotation. See Tilt Axis. |
In non-rotary linear milling operations, the machine table and spindle move in the X, Y, and Z axes. In rotary-axis and/or tilt-axis milling operations, the A, B, and/or C axes replace the corresponding linear axes.
|
|
|

The configuration of rotary and/or tilt hardware installed in your machining center will determine which axes are available for rotary-/tilt-axis milling operations.
Rotary Axis
Rotary-axis operations in a Conversational rotary part program are similar to standard milling operations, except that the rotary milling feature (e.g., rotary circle, rotary frame) is wrapped around a cylinder. Rotary-axis operations can be performed on a 4-axis or 5-axis machine where the part is fixtured to the centerline of the rotary-axis.
|
|
A rotary-axis table can move in a 360º rotation in both positive and negative directions. |
Tilt Axis
A pivoting rotary table allows you to tilt the table to a specific angle during machining. Any rotary program or standard milling operation can be executed at the tilt position, but the tilt-axis will remain stationary while the data block is being machined. If you want to machine a part while moving the tilt axis, you must use NC programming. Refer to the WinMax Mill NC Programming manual for more information.
|
|
A tilt-axis moves less than a 360º rotation. The machine configuration determines the limits of tilt-axis rotation. |
Configuration of Hurco Machining Centers
Hurco machining centers provide a variety of machine configurations. Rotary and/or tilt tables can be installed in Hurco machining centers, either at the factory or on-site. Some Hurco machine models come with rotary hardware as standard equipment. The table below shows configurations available for Hurco machining centers.
|
Configuration |
Machine Type |
|---|---|
|
Universal |
All axis configurations and machines |
|
Rotary A |
4-axis rotary machining |
|
Rotary A, Tilt B |
4-axis rotary and 5-axis rotary or tilt machining |
|
Tilt A, Rotary C |
4-axis rotary and 5-axis rotary or tilt machining on trunion table machines |
|
Rotary B |
4-axis rotary machining on horizontal (HMX) machines |
|
Tilt B, Rotary C |
4-axis rotary and 5-axis rotary or tilt machining on SR machines |
Rotary Configurations Available on Hurco Machines
Setting the Axis Configuration
You must set the axis configuration in the Conversational part program before you program rotary or tilt operations. Follow these steps to set the axis configuration:
-
Press the Auxiliary console button to access the Auxiliary screen.
-
Select the Utilities icon from the Auxiliary screen.
-
Select the User Preferences softkey.
-
Select the Conversational Settings softkey.
-
Select the axis configuration from the Default Conversational Program Type drop-down list or softkeys on the Conversational Settings screen (configurations listed below are not available for all Hurco models):
-
Standard—Non-rotary
-
Rotary A—Rotary axis
-
Rotary A Tilt B—Rotary and/or tilt axis
-
Tilt A Rotary C—Rotary and /or tilt axis
-
Rotary B—Rotary axis
-
Tilt B Rotary C—SR only
-
Universal—all configurations (default)
-
|
|
Select the axis configuration for all of the axes on your machine, even if you don’t think they will be used in the program. Rotary- and/or tilt-axis data blocks can be added to an existing program as long as the rotary-axis and/or tilt-axis configuration was selected when the program was first created. Once an axis configuration is set for a program, it cannot be changed. However, you can use an existing Conversational program to create a new program that contains rotary-axis and/or tilt-axis programming data blocks. Follow these steps to create the new program:
|


